Load data
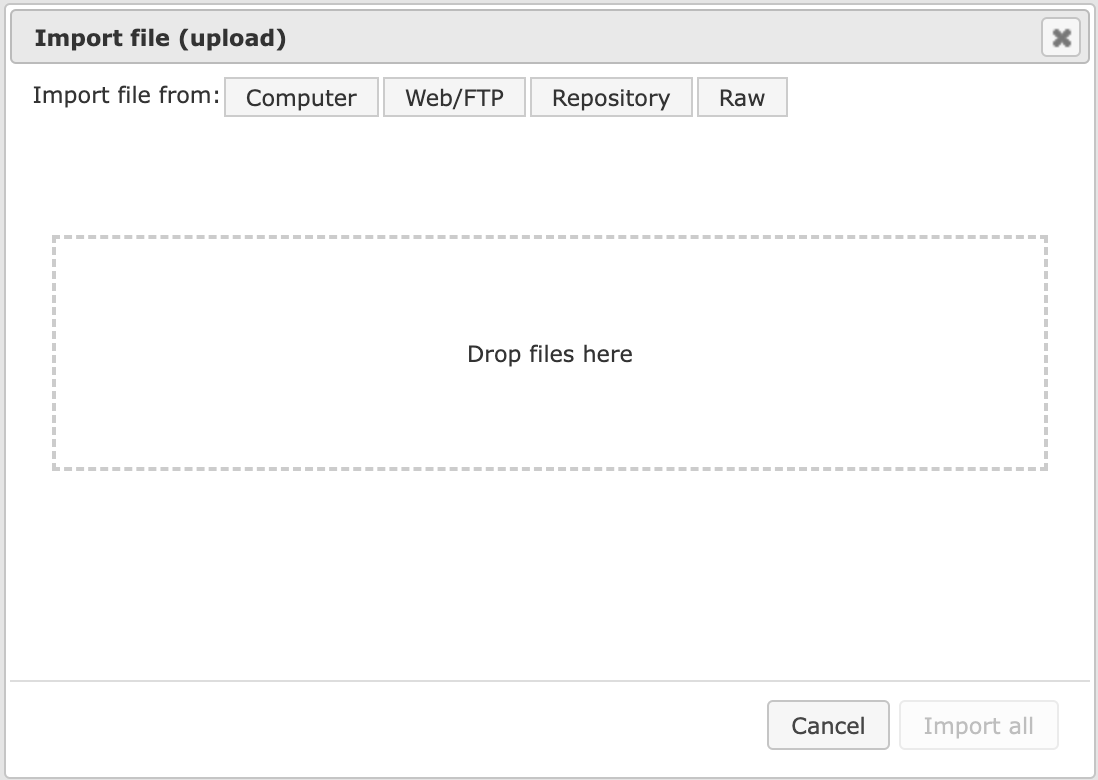
The first step is to load your data into the system. This is facilitated by the first topic listed on the Start page. When you click on the term “Load data”, another window with the title “Import file” is opened asking you for the file to upload. By clicking into the topmost field (Target folder), you can select the place where you want to save the file that you are going to upload. This file you can select by several options: upload from your computer, import directly from an FTP address, choose an item from the tree in the geneXplain platform, or paste data, e.g. a DNA sequence. Use one of the buttons [Computer], [Web/FTP], [Repository] or [Raw] to start the import.
Import a file from a local computer
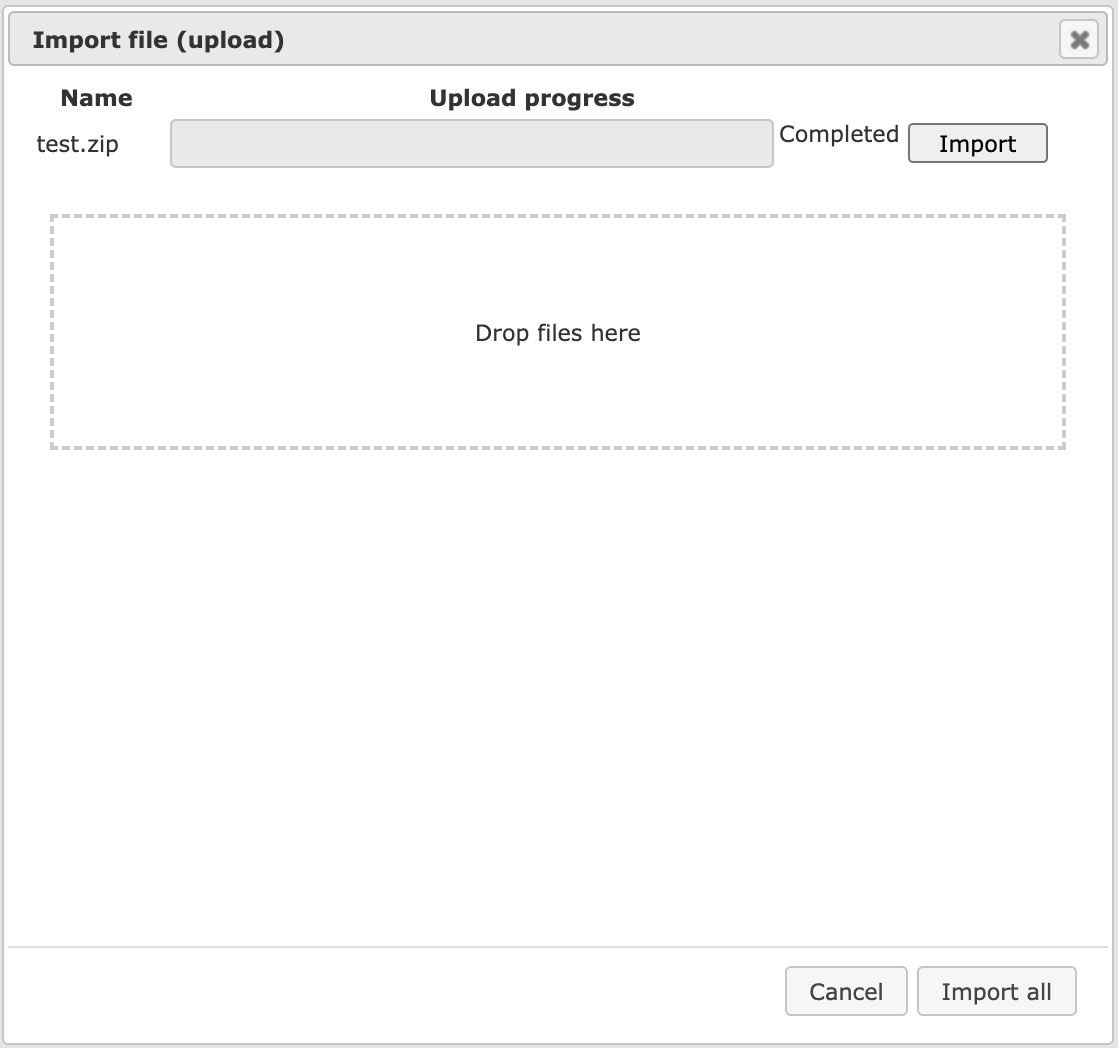
Let us assume you wish to detect differentially expressed genes in your microarray experiments, which is one of the following workflow groups on the Start page. In this case, you might be interested in uploading an archive (ZIP, TAR, GZ,…) of several CEL files (when you worked with an Affymetrix platform). In case of importing raw microarray results, we recommend creating a single ZIP archive of all files that you plan to normalize together. Please note that uploading is a lengthy process, and it may take some time. However, if in the uploading bar you see no progress and just 0% for about 10-15 minutes, please cancel and start again, it might be that the server was overloaded at that moment. Wait till the progress bar is completed. The picture below shows an ongoing uploading.
The uploading step is similar for all file formats. After the uploading step has been completed, the next step is specific for the file format, and different forms are displayed for different formats. Here, let’s consider two examples, loading a ZIP archive with Affymetrix CEL files and loading an Excel table.
Loading a ZIP archive with Affymetrix CEL files
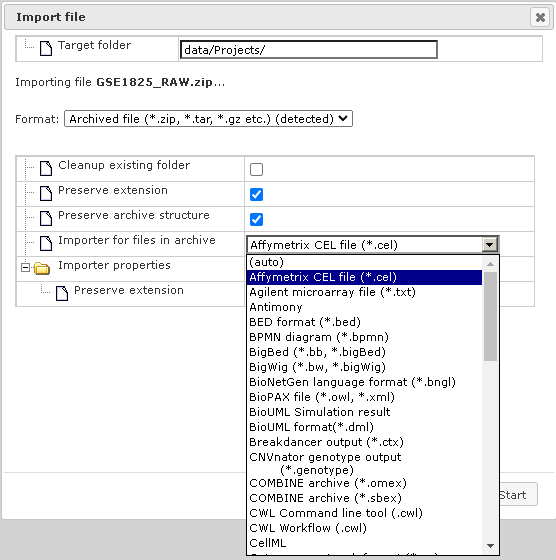
When the uploading step is complete, additional options will be displayed, as shown below. The format of the imported file is detected automatically and will be indicated in field “Format”, in the example below it is ZIP-archive. Verify the automatic detection and if necessary refine it manually using the drop-down menu. Next, verify four fields as follows.
In case that here exists already a folder with the same name as the imported file, it will be replaced by imported data if you activate the checkbox “Cleanup existing folder”. Checking the box “Preserve extension” means that individual CEL files will keep the extension ”.CEL” after importing.
Checking the box “Preserve archive structure” allows you to keep the archive structure (folders and subfolders) after importing. Next, choose the type of the files within the imported archive (if an archive is imported), here the “Affymetrix CEL files” row is selected, indicated by the dark blue background in the picture below. Finally, press the [Import] button.
Each imported archive or individual file will appear in the Data tree of the Tree Area when import is complete.
Loading an Excel table
After the uploading step of an Excel table is completed, the following additional options will be displayed as shown below:
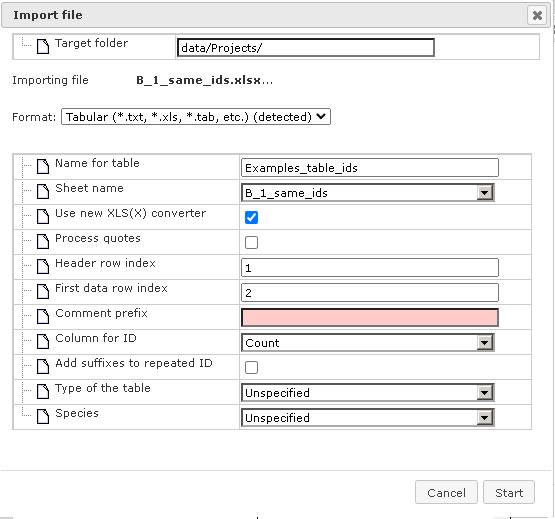
The format of the imported file is detected automatically and is indicated in the field “Format”. In the figure above it is the Tabular format, which includes the XLS format among others. Verify the automatically detected format and, if necessary, refine it manually using the drop-down menu. Next, verify the following fields.
Name for table – the name of the uploaded Excel table is shown automatically; you can modify it, and under this name the table will be shown in the tree after import is completed. “Sheet name” – with the help of the drop-down menu specify which page of the Excel file should be imported (for Excel files with multiple pages).
Header row index – the number of header rows in the Excel table is detected automatically, in this example there is one header row. Verify automatic detection and if necessary correct the number. “First data row index” – the number of the row where the data start is detected automatically, in this example the data start in the second row and in the field figure “2” is shown. Verify automatic detection and, if necessary, correct the number.
Column for ID – use the drop-down menu to indicate which column in the imported table contains unique identifiers. The column “ID” is suggested automatically. Verify automatic suggestions and refine it as necessary.
Type of the table – this field aims to specify what type of IDs are used as identifiers in the imported Excel table. Use the drop-down menu to specify. In this example IDs in the Excel table correspond to Entrez gene IDs, and correspondingly in the figure below “Genes: Entrez” is specified.
Species – use the drop down menu to specify the biological species that corresponds to the IDs.
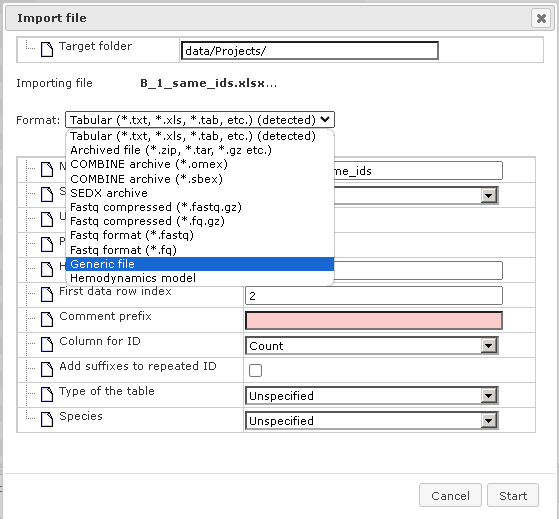
After that, press the [Import] button, and you can find the imported table in the tree, under the location specified in the “Import file” form in the field “Target folder”.
A number of file formats can be defined for import. You find them listed when opening the “Format” selection list. If you can’t find the required format explicitly listed, select “Generic file”.
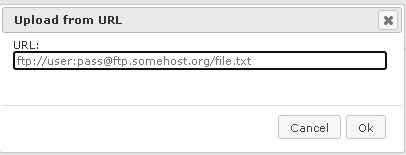
Uploading data from URL
This option allows you to upload data directly from the web, e.g. by indicating an FTP address, which is significantly faster in comparison with downloading to a local computer and then uploading into the geneXplain platform. If your data are located on a web server, this would be a preferable way of importing.
First, press [Web/FTP] button on the “Import file” form, and indicate the ftp address in the newly opened form as shown below:
Paste plain DNA sequence
If you would like to import a plain DNA sequence, not saved in any file before, first, choose the button [Raw] on the form “Import file”, and a new form will be opened as shown below:
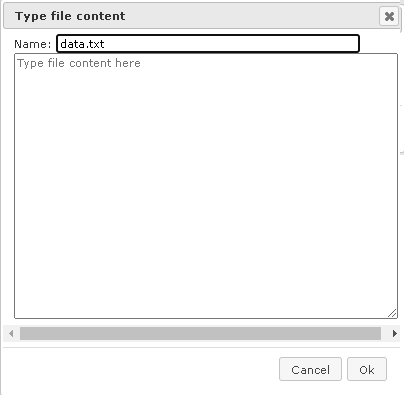
Paste the DNA sequence in the window “Type file content here”, and in the field “Name” specify a name as it should appear in the tree after importing.
Upload SRA files by SRR ID
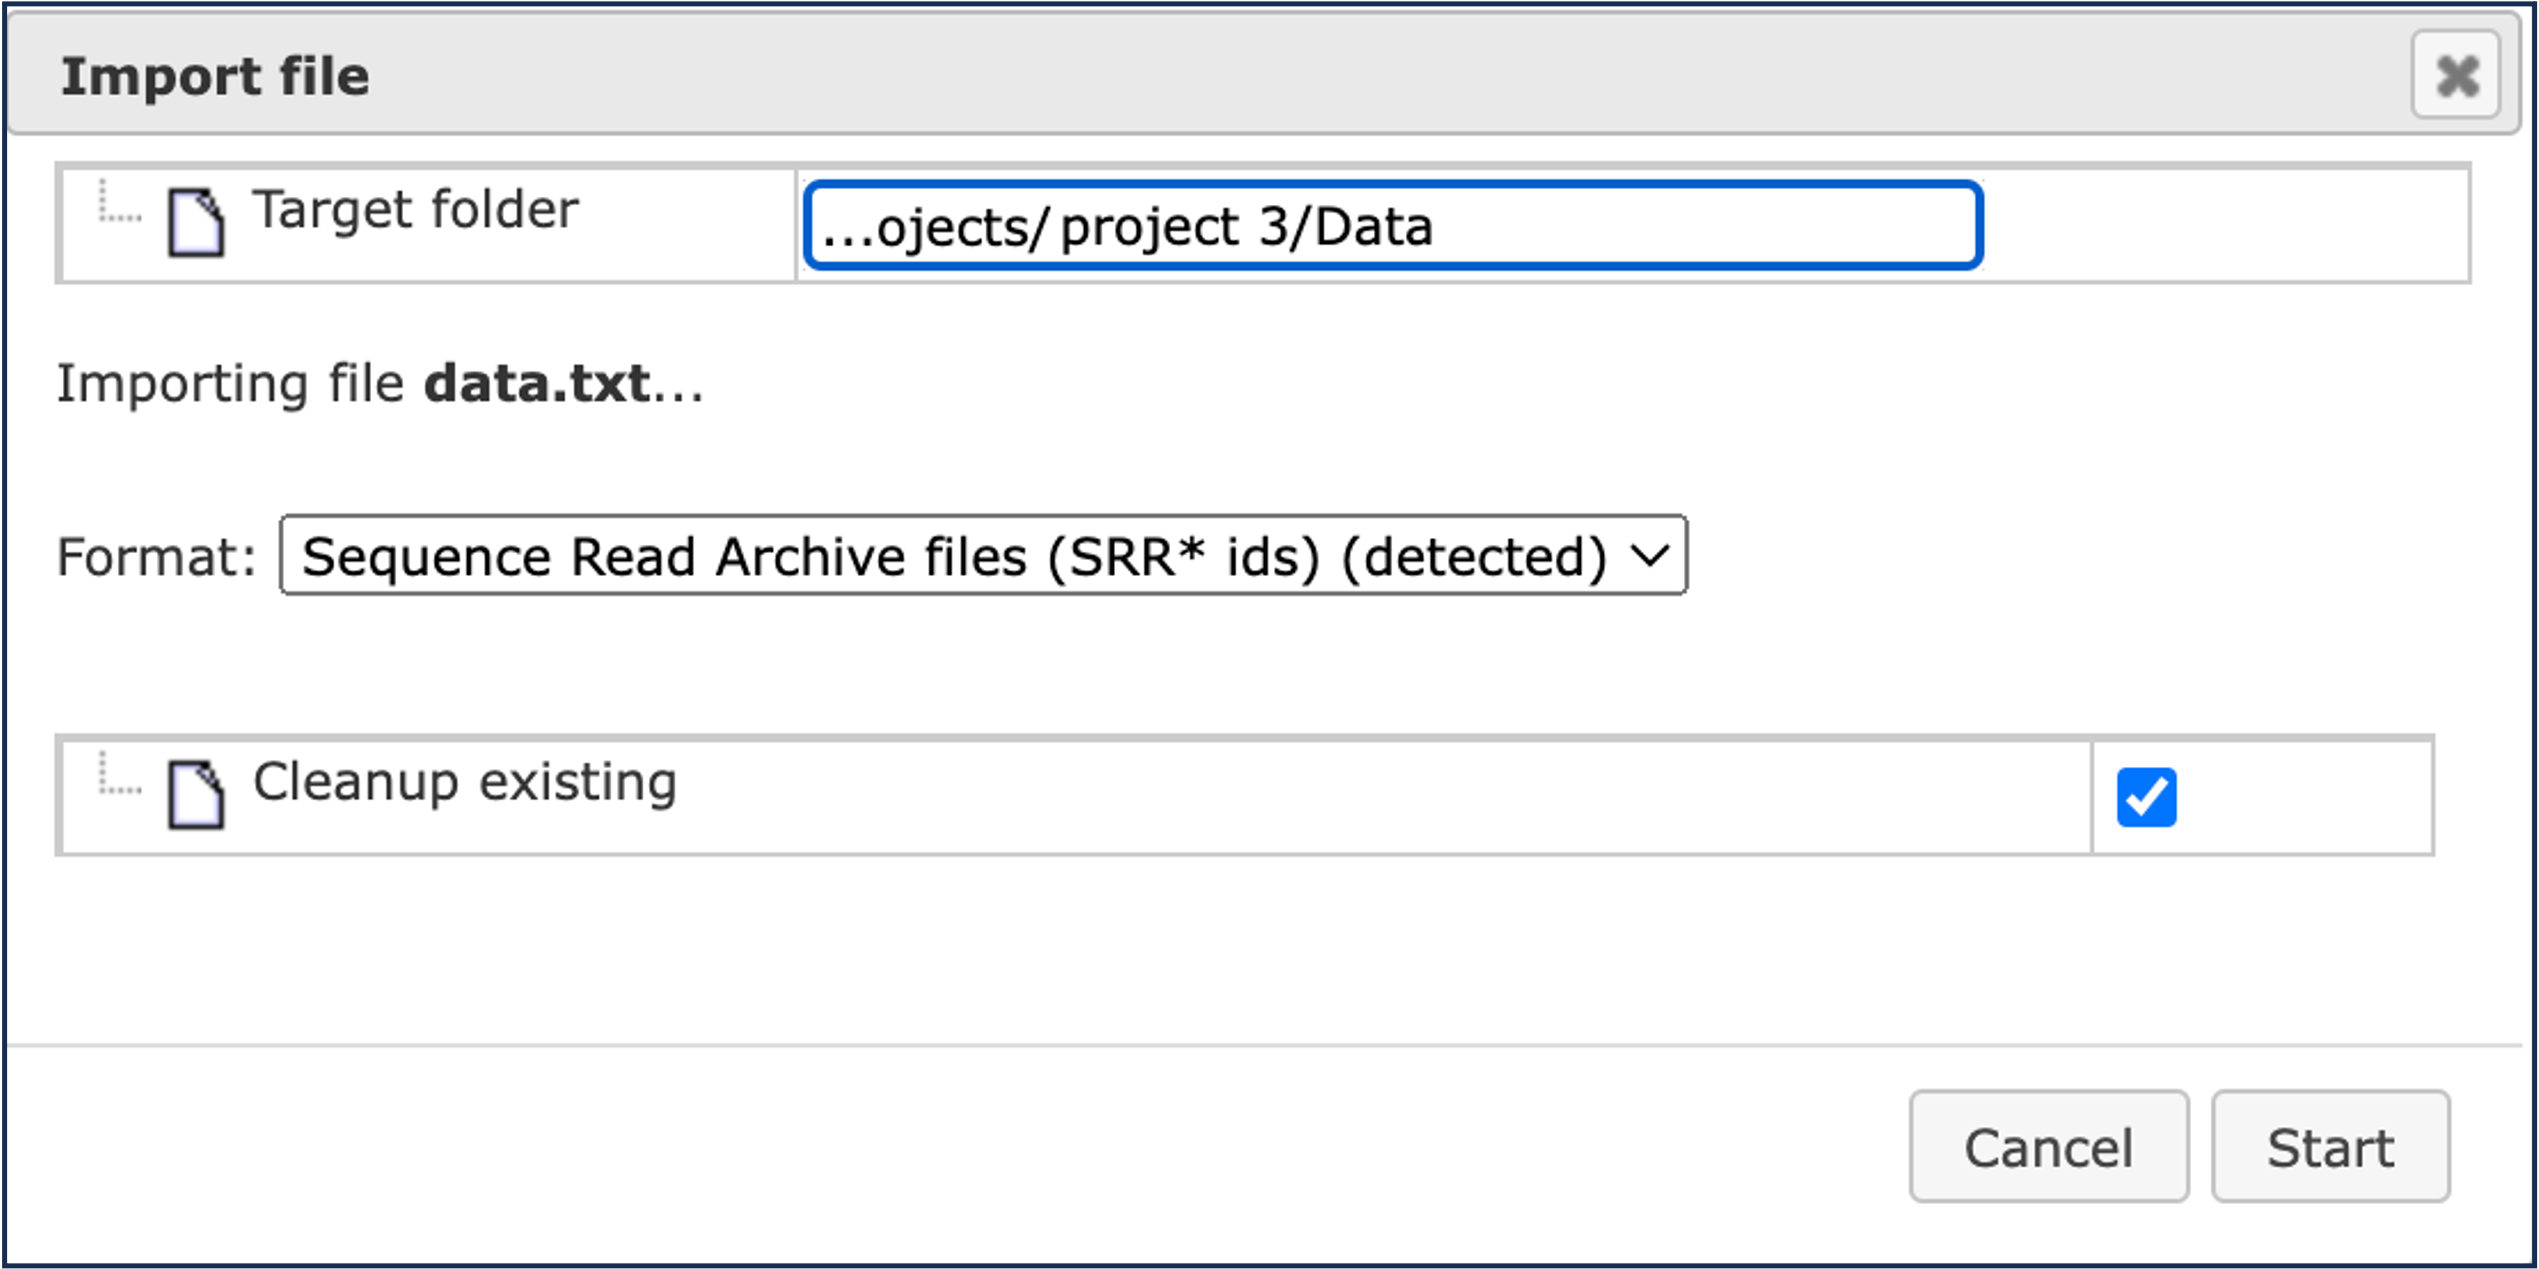
If you would like to upload data from the Sequence Read Archive (SRA) you can do it directly using the SRR IDs of the respective samples. For this, choose the button [Raw] on the form “Import file”, and paste the SRR IDs of the sample(s) of your interest in one row as shown below:
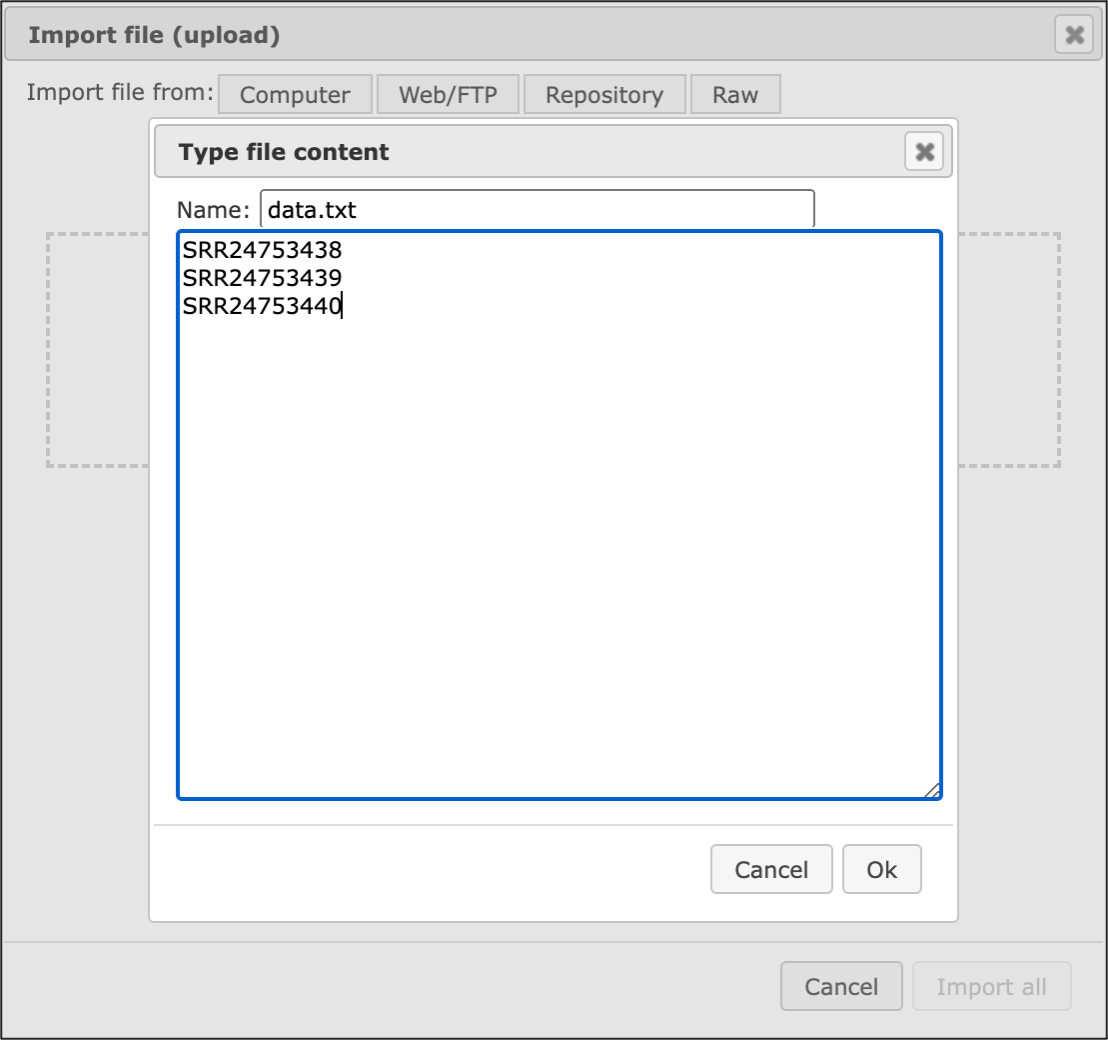
When you will click on [OK], you will see that the platform has automatically detected the type of your file(s) as Sequence Read Archive files:
Click on [Start] to launch the import.
The Cleanup existing option ticked by default will rewrite any existing SRR files with the same names as the ones being loaded via the current import in your target folder.
When import will be finished, the newly loaded SRR files will appear in the target folder that you have specified in the Target folder field of the form presented above (by default, it will be the Data folder of your project).